In this quick guide, we’ll walk you through the 7 steps you need to complete to automate your art sales with creativehub & Squarespace.
Step 1: Sign up to creativehub
Sign up for your free creativehub account here. If you already have an account, simply login.

Step 2: Upload your files, set your price & sizes
- Once logged in to your creativehub account, you’ll land on an option page.
- Select the ‘Sell art online’ card and follow the quick tutorial to set up your products.

Step 3: Create your Squarespace store
- Head to Squarespace to sign up for an account and choose your subscription plan. Note Squarespace requires users to be on the ‘Commerce’ or higher plan to enable e-commerce.
- Once you have created your account, choose a template and design your store. Squarespace offer a wealth of templates with a focus on e-commerce.
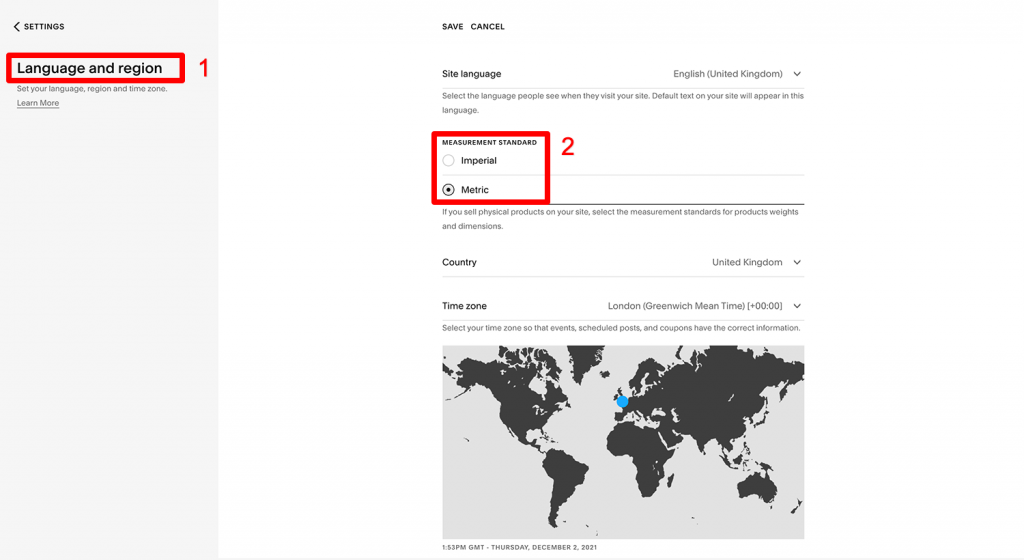
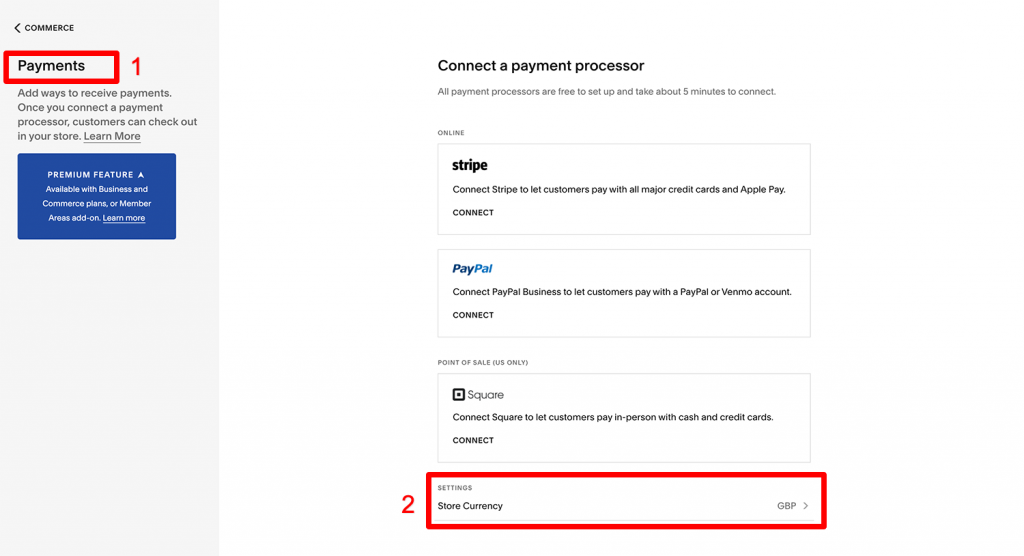
- Next, select your desired store currency and measurement preferences – this will ensure we import your products with the desired values.
- To choose measurements preferences, from your main Squarespace menu select: ‘settings’ > ‘language & region’ > ‘measurement standard’
- To choose store currency preferences, from your main Squarespace menu select: ‘commerce’ > ‘payments’ > ‘store currency’
Step 4: Connect creativehub & Squarespace
- Navigate back to your creativehub account.
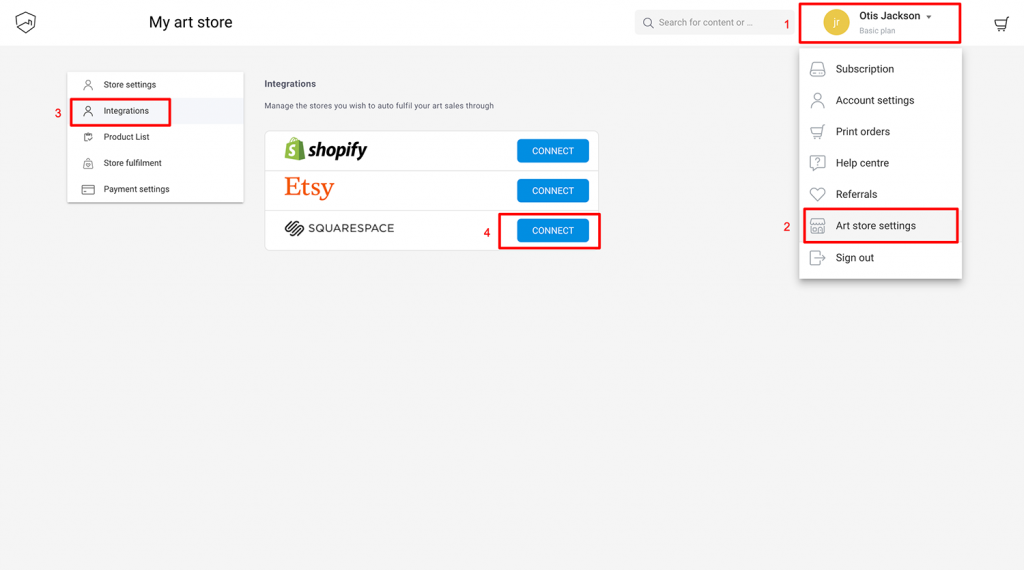
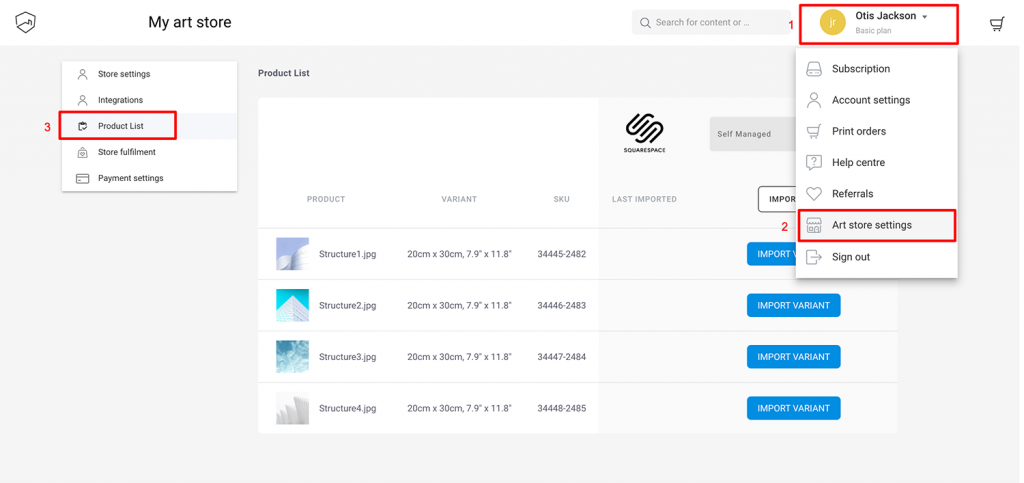
- Access your main setting menu by clicking your name/avatar in the top right
- Select ‘Art store settings’ from the drop down
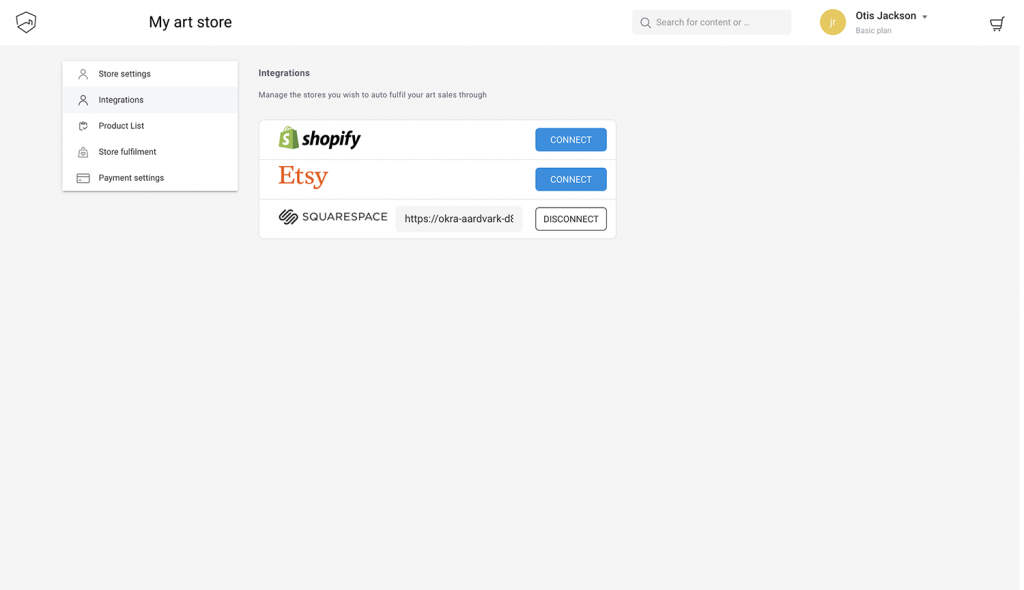
- Click ‘Integrations’ from the left hand side menu options
- Click the ‘Connect’ button next to the Squarespace logo
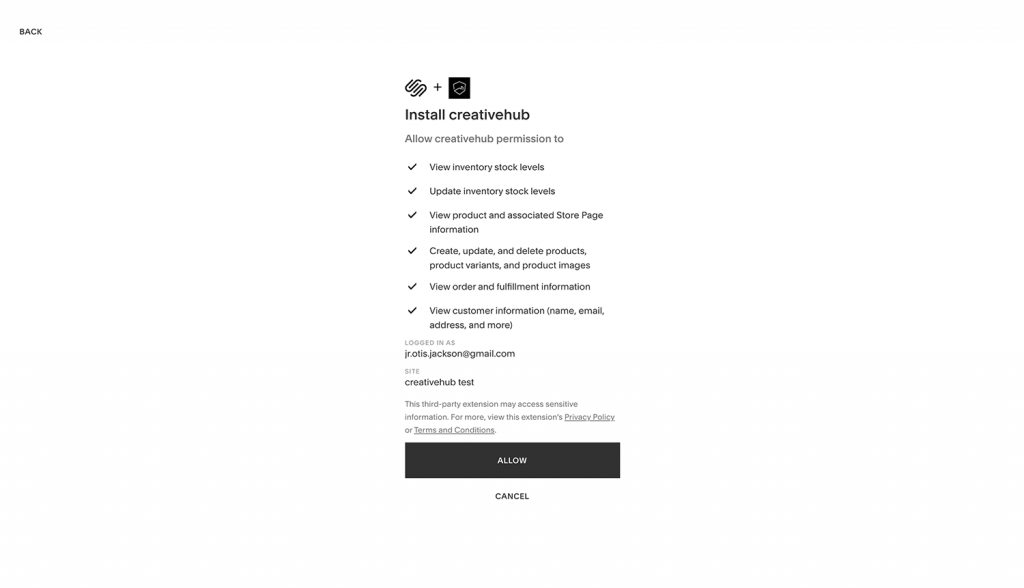
- Clicking ‘Connect’ takes you to a Squarespace page where you are asked if you would like to connect your store with creativehub. Authorise this connection.
- Once connected, you’ll be auto directed back to your creativehub account. Notice Squarespace now displays as connected.
Step 5: Push your products to your Squarespace store
- Once your prints are priced (step 2), these will be listed in your creativehub account in the ‘Product list’
- This is located in ‘Art store settings’ > ‘Product list’
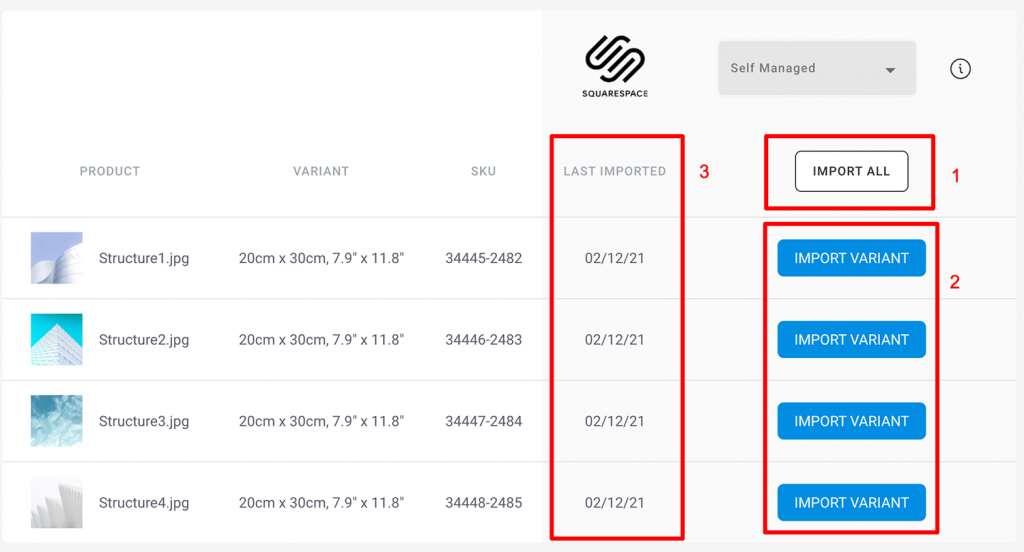
- Next, click ‘Import all’ if you wish to push all your products to Squarespace. Alternatively, import variants individually. For more detailed information regarding your product import options, read this help article
- Once imported, you’ll see the import date in the ‘last imported’ column.
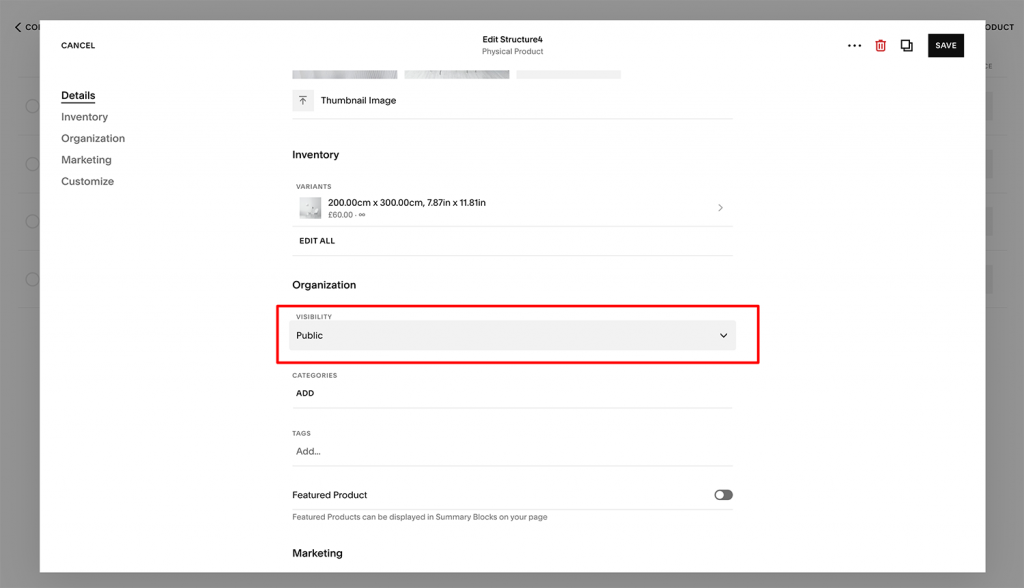
- Your imported products can be found in your Squarespace account by selecting ‘Commerce’ > ‘Inventory’
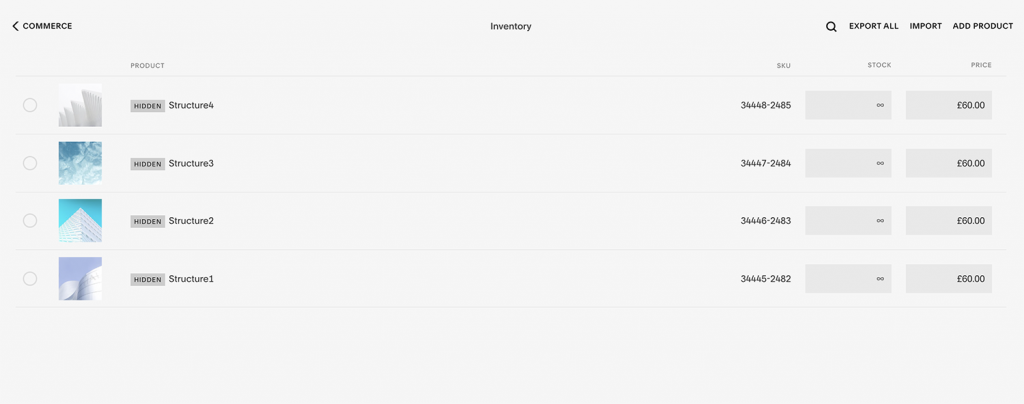
- To list your product for sale, click the product name, then change the ‘visibility’ from ‘hidden’ to ‘public’
Step 6: Add a payment card so we can fulfil your Squarespace art print orders
- When you sell a print in your Squarespace store, the customer pays you the full amount via your chosen payment method (this is configured in Squarespace main settings).
- We then debit you separately for the production & shipping costs.
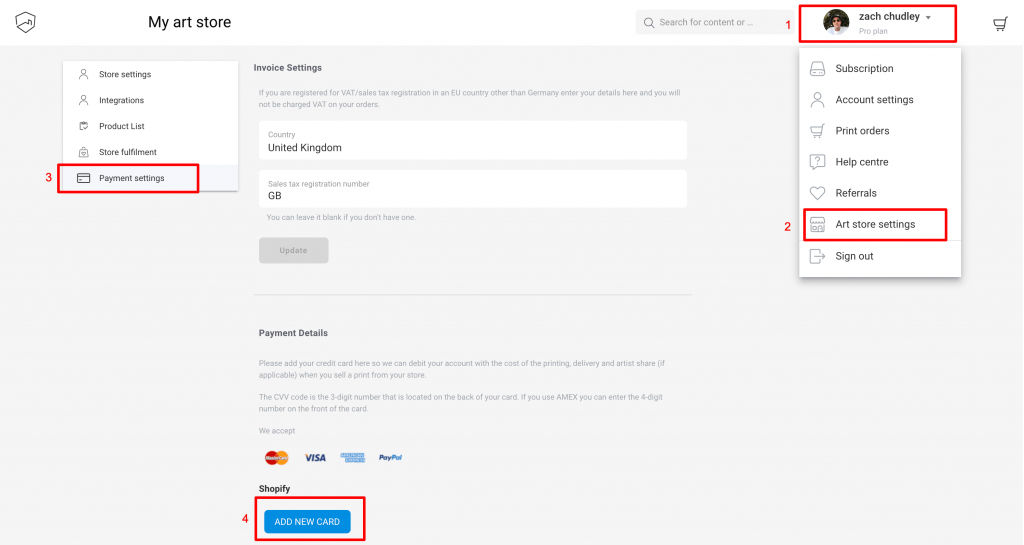
- You’ll need to add a bank card to your creativehub account for us to be able to take this payment.
- To do this, click your profile icon in the top right of the page and select ‘Art store settings’ from the drop down options.
- Then click ‘Payment settings’ on the left hand side menu.
Step 7: Driving traffic to your store
- Great, you are all set up with your new online art store! When a print sells, we’ll handle fulfillment and ship direct to your customer within 2-5 working days.
- Now it’s time to start thinking about driving traffic to your online store.
